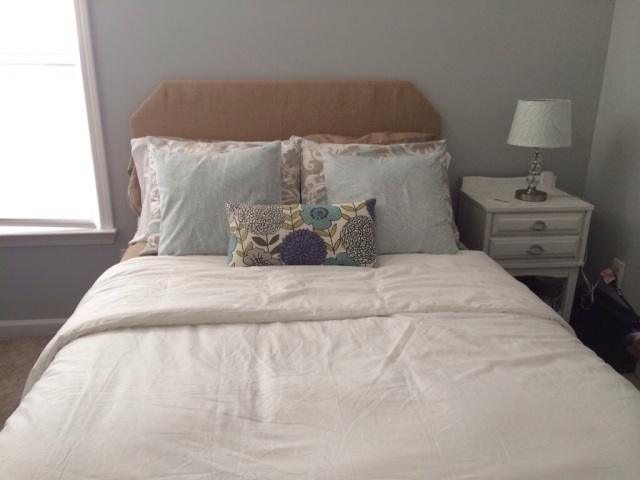
New house, new sewing room

We moved into our new house just before Thanksgiving. Nothing like moving and decorating for Christmas all at the same time, but we did it! In our old house, I operated out of our dining room. The space was plenty big enough, but I hated that everyone who came over walked straight into my “office”. Anyhow, when we found this house, it was decided that the third bedroom would be mine. I love that there is a door that I can close and hide my mess. I also got super excited about shopping for furniture to fill my space, rather than using our dining room table for everything. Like everything in my house, this is a work in progress. I’d love to paint the walls and get some color. I’m still back and forth on whether or not I’ll move the orange chair into Zac’s bedroom, but for today- here’s the tour.

This picture was snapped walking through the door. My favorite thing in this room is the butcher block island (purchased from Ikea) that I use as a cutting table. It’s 35.5″ high, making it perfect for cutting fabric and piecing patterns. 20288_10102614143053491_8697701657143798041_n.jpg

As you walk further into the room, I have two desks (also from Ikea), used for my sewing machine and serger. The picture ledge above the desk is also from Ikea. Can you tell I LOVE Ikea?? On the other side of the room is a futon. While not the most comfortable, it serves as our guest bed when my mom or mother in law come to stay. Zac also spends a great deal of time hanging out, reading books, and currently the sofa is covered in Star Wars action figures and the Millennium Falcon. If the pillows look familiar, they were previously in our guest room. I loved them and had to find a way to repurpose them in our new space. 11694913_10102614143103391_2616826652511001859_n.jpg12798946_10102614143063471_3714177160664656571_n.jpg

Here’s a peek inside the closet. I have fabric stored in the bins at the bottom, although I’d love to come up with a better storage solution. I added shelves to accommodate my silhouette cameo, and beside that is my backup singer sewing machine.12794524_10102614143248101_4834542297622223357_n.jpg

Here’s a better look at the desks. I have patterns stored in hanging files at the bottom of the filing cabinet. The top drawers house scissors, screw drivers, and other tools necessary when making a quick fix to either machine. And, the last picture is looking back towards the door. Under the island are shelves used to house more fabric, and random sewing supplies. On top of the island is a wooden block used to hold my quilting rulers. My embroidery machine is still on the antique singer sewing desk that belonged to Patrick’s great, great grandmother. 12794354_10102614143143311_7824083459947527487_n.jpg12799190_10102614143228141_5035551390596157663_n.jpg

That’s it! Hope you enjoyed it. Next up on my house tour will be Zac’s room.

DIY shelves

I’m almost complete with my 1 room, 30 days bathroom challenge and I can’t believe the transformation. Today I completed the shelves and couldn’t wait to post about it. I found several posts on Pinterest about DIY shelving, and thought- what the hell!

I bought a board from Lowes (10″ deep x8′ long) for less than $8. I also bought stain, brackets to hang it on, and my favorite antique bronze spraypaint because the brackets were silver. (Also on my cart was my shower rod).  

Over the weekend my husband cut the board to length for me. I decided to make my three shelves 22″, which gave me a slightly longer board left over that I hung in my laundry room for more storage there.   

Yesterday I got to work staining and spray painting. I don’t think I’ve ever stained anything before, but it was pretty easy and I only needed one coat. 


I let everything dry overnight and got to work hanging them today. I first used the long level to mark a line on one side of the toilet and used that as a guide for one side of brackets. I used drywall anchors rated for 75 pounds, so I feel confident that these shelves are secure.   

Hanging the left side was the tricky part. I needed to make sure the brackets were level horizontally and vertically. An extra pair or hands would have been helpful, but I was able to make it work using the level.    


Next up was the fun part. I made sure the shelves lined up and were centered on the brackets, then secured them with a screw from underneath. I am in love with how this turned out. All together, I spent around $45 (3 sets of brackets at $7 each, $8 for the board, $7 for stain, and $6 for spray paint, plus screws). 

  
Lucky me, baskets and home decor was 50% off at Hobby Lobby this week. I have toilet paper in the red bucket and wash clothes in the basket on the middle shelf. The picture frame and anchor artwork are also from Hobby Lobby, and the sailboat is from Target. Next up for my bathroom makeover is towels, but I’m going to take the next couple days and catch up on some sewing. 


1 room, 30 days- bathroom makeover

Our house is a ranch, 3 bedrooms, 2 baths. The guest bathroom/Zac’s bathroom was covered in a floral wallpaper that was peeling. It looked OK when the previous owner lived here, but Zac’s bathroom stuff from the old house clashed terribly.  Anybody who visits our house uses this bathroom, so I felt motivated to get the looking nice. 

   
A few weeks ago I decided to see what would happen if I started peeling the paper off. Good news- it literally peeled off in sheets. Bad news- behind the wallpaper was this horrible textured paint…


So, fastforward to April. I am taking part is a 1 room, 30 day challenge, and given the state of this bathroom it was a no-brainier as to which room needed the most help in our house. The first thing that needed done was the walls. 

The walls looked worse than they felt, but they were bad. I ventured off to our local Sherwin Williams and asked for guidance. They were super helpful and recommended a matte finish of paint. The guy said any sort of gloss, or even an eggshell finish would highlight the texture. I bought a paint + primer of their top of the line Emerald paint. While searching Pinterest, I decided on Repose Gray for color. This paint was worth the money. It covered fantastic, and while the walls still show a little bit of texture, it’s 100% better, and probably the best it could be without re-drywalling the room.

 Next, I bought a new shower rod. I wanted something to match the rest of the fixtures in the bathroom, so I bought one in antique bronze. I also hung a picture I bought from Target. This week, I’m making shelves to go behind the toilet, and trying to decide what I want to do for towels and find a bath mat. Stay tuned!  

Kitchen Table Makeover

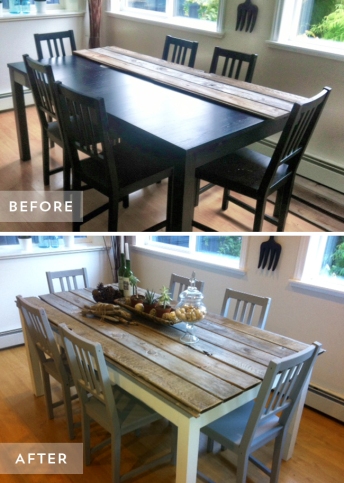
The first weeks of summer are when I get projects done. I think it goes back to my days teaching, and waiting for summertime to conquer my projects. 9 years ago, my husband and I bought our first (and only) house. We felt the need to fill it with furniture even though we didn’t really have the extra cash to do so. One of our first purchases was a new kitchen table. A kitchen able should be something you invest money in because it takes a lot of wear and tear. We did not… It didn’t take long for our new table didn’t look new anymore, but we just lived with it.  Perhaps you’re in the same situation. Well, if you are, keep reading!! A few months ago, I was browsing pinterest and this picture came up. I immediately fell in love. I desperately want a farmhouse table, but I know this house isn’t our forever home and don’t want to invest the money until we move. This project looked so easy- paint and slap some wood on top (my husband is a woodworker so he could help).

BATable

Much to my disappointment, my husband pointed out that the grooves in that table would be a magnet for crumbs and the other gunk that our toddler leaves behind. So, back to Pinterest I went for new inspiration and I found this-

DSC_0038I loved the contrast of the chairs to the table. Our kitchen walls are painted a light blue, our cabinets and floor are a dark wood, and I have orange accents in the kitchen. I considered orange chairs for a pop of color, but didn’t like the way that looked with the floors and cabinets. Matching a blue to coordinate with the wall would be too difficult, so I thought I’d play it safe and just go with grey. When I googled grey chairs/white table, this picture came up and I knew we had a winner.

gray-table

I went to Lowes and bought some supplies, 4 cans of Valspar satin spray paint. It’s a paint plus primer and seriously the best. I did a couple of coats of the paint on the chairs. IMG_9861All of this was done the Sunday before Memorial Day. I woke up, told my husband- “hey, I think I’m going to start the table project”, and by dinnertime the chairs were painted. He’s come to understand that this is how I work. I get an idea and run with it. While we were at Lowes that morning, I picked up several (ok, probably 30) paint swatches for different greys. We decided on  “armitage grey” from the HGTV Home collection by Sherwin Williams. Monday night I primed the table. I had primer left over from my guest room makeover project last spring, and Tuesday I painted the table grey. During all of this, we ate our meals in the family room. 🙂

11257836_10102179878293551_5667762676562468475_n

11295915_10102183516307941_6657329803688140732_n

I let the paint dry a couple days before I put on 3 layers of polyurethane. I needed durability, and didn’t necessarily want a lot of shine, so after talking with the wonderful people at Lowes, I went with a semi gloss. It went on really easily and the smell was almost nonexistent. Best part is, it dried in 2 hours! They recommend 48 hours before using the table, and 7 days for it to fully cure, so we continued to eat in the family room through the following weekend. The final touches were placemats and seat cushions. I loved the grey and white, but it needed some color. I spent probably $60 on painting supplies for the table and chairs and felt I could splurge a little for cushions. I am so glad I did because I LOVE how this turned out.


Tuesday Tutorial, how to make a crib skirt

Happy 2015 friends!! One of my new year’s resolutions was to be a better blogger. Seeing as today is the 20th of January, you can see how well I’m doing with my resolutions… One thing I want to start in the new year is Tutorial Tuesday, where I give you step by step directions on how to complete a project. I won’t promise that this will happen every Tuesday, but I’ll do my best to post a couple tutorials a month. The first tutorial is how to make a crib skirt.

The first thing you need to do is measure your crib mattress. They vary in size slightly, but it should measure somewhere around 28″ wide and 52″ long. The next thing you need to do is determine how long you want to make your skirt. If you’re a first time mom, you probably aren’t thinking that you’ll adjust your crib height as your baby grows and starts sitting up, and then standing. I didn’t, and when I made a crib skirt for my son’s nursery a few years ago, I made it touch the floor and then a few months later it was too long. I recently made a crib skirt for my childhood best friend’s new baby and I made her’s 14″ long. (This tutorial can easily be adjusted to make a bedskirt for any size).

For this crib skirt, I used home decor fabric which measured 56″ wide. The home decor fabric was heavy enough weight that I didn’t need to line it, AND wide enough that I was able to buy less yardage. I purchased 2 yards, but could have gotten away with only 1.5. I also bought a piece of cheap white fabric to use as the base that lays under the mattress. Nobody will see it, so feel free to use a scrap of something leftover from a previous project.

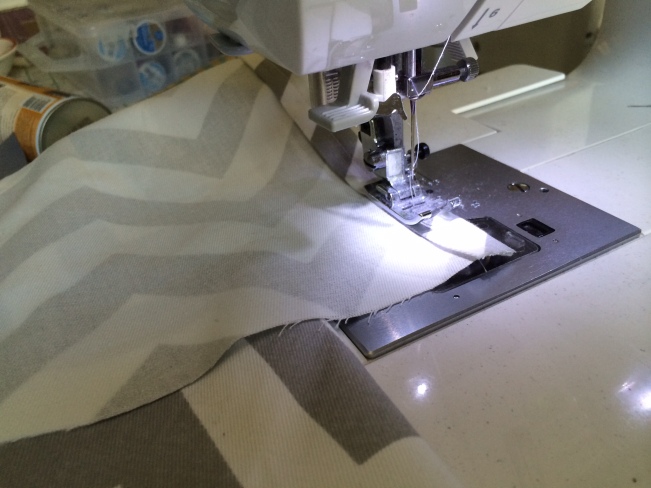
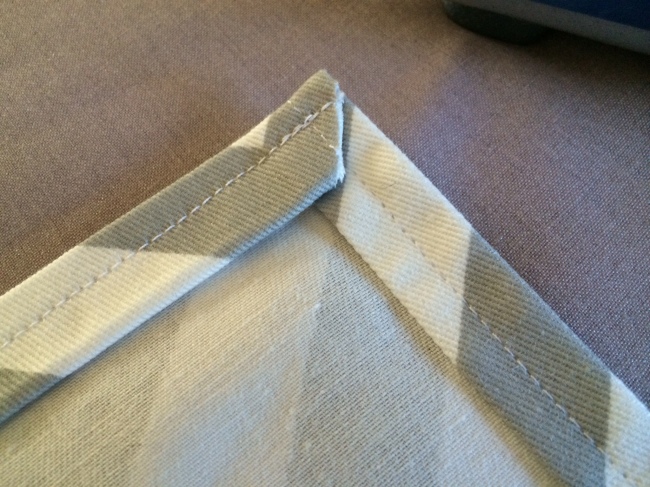
Now that you have your measurements, cut your pieces to size, leaving an inch clearance on the two sides and bottom, and a half inch seam allowance on the top. I folded over the sides and ironed, and then folded again to hide the raw edge of the fabric and sewed.

IMG_0444 IMG_0445 IMG_0446

Next, I repeated the same step with the bottom hem of the fabric. I snipped the corners at an angle and sewed. Repeat this with all 4 side panel pieces.

IMG_0447 IMG_0448 IMG_0449

Now, your’e ready to attach the pieces to your base, which should be cut the exact size of your crib mattress. I used a serger to attach my fabric pieces because I wanted a finished look. If you do not have a serger, a zig zag stitch will work just fine. I promise you, nobody will ever see this, and chances are, you won’t be washing the crib skirt, so you have very little chance of it fraying. Once you’ve sewn all for sides, iron them flat, and ta-da!!

IMG_0451 IMG_0452 IMG_0453

You can get as fancy as you want to with your crib skirt. Here is the finished product on the crib. I also made a chevron quilt for this nursery, and I’ll post about that on another Tuesday tutorial. For my son’s crib skirt, I added a stripe across the bottom. To make this adjustment, just account for how wide you want the stripe and subtract that from the length of your other fabric.

IMG_0476 300210_10100134957436341_793101599_n

I hope that this tutorial was helpful. I’d love your feedback or to see completed pictures of crib skirts you make. Please check out some of my other tutorials.

Upholstered Headboard, revisited

I realized today that I never updated the blog with the completed upholstered headboard. To give it a finished touch, I hammered in bronze furniture nails. Easier said than done… I’m not sure if it was the plywood, the nails, my lack of muscle, or (most likely) a combination of the three, but this took FOREVER!

I realized quickly that I lack the ability to eyeball a straight line, so I used my water soluble embroidery pen and a straight edge to make a guide. I then used my thumb to space out the nails. The burlap was forgiving and hid all the holes from the many (MANY) nails that needed to be removed. Most nails would go in fine until at first and then bend. After the fact, I talked with a friend who does this often and said she pre-drills holes.

So here it is- the good, the bad, and the ugly. No blood was shed during this project, so I consider that a win, and I love the finished product, but I’n in no rush to use finishing nails again.

20140729-145817-53897600.jpg20140729-145818-53898450.jpg20140729-145819-53899440.jpg20140729-145820-53900002.jpg


New Pillows

I recovered the chair in our front sitting room (which is quickly becoming a playroom…), and quickly realized that my green pillows on the sofa didn’t match. What is a girl to do?? I went back and forth on whether I should use the same fabric from the chair to cover the pillows, and when that was on backorder, my decision was easy. I choose a coordinating print and I am oh so glad I did. I had a rectangle piece of chair fabric left and decided to use that for a third pillow and I love the asymmetricalness (yep, just made up a word). So, here it is-


20140630-091216.jpg

20140630-091311.jpg

20140630-091324.jpg

The Tale of 3 Chairs…

It all started because the chair in our front room needed help. I recovered that chair myself 7 years ago, and 2 dogs and a toddler were more than it could handle. Recovering that chair was one of the toughest sewing projects I’ve taken on, and I really had no desire to do it again, so I sent off to find myself a new (already covered) chair. I purchased the vintage rocker, but when I brought it home I didn’t like how the colors looked with the curtains. Curtains are expensive to buy, even more expensive to make yourself, and so that’s when I decided to switch up everything. The rocker went upstairs into the guest room which was getting made over anyways, and I decided to bring the chair that was upstairs down into the front living room. Those colors didn’t match either, so I faced my fears and recovered it to match.
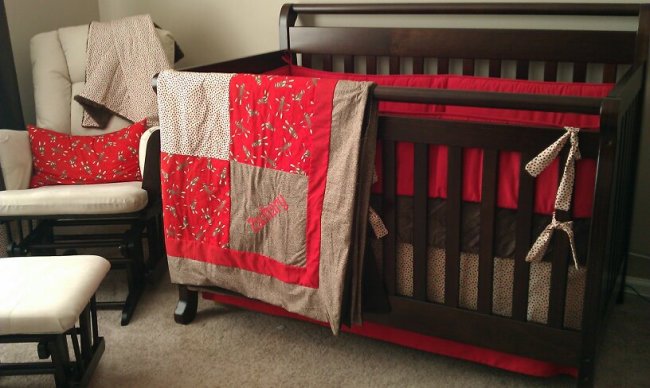
One mistake I made with the original chair was not using a sturdy enough home decor fabric. The fabric I used this time is almost canvas like, and I think it will withstand the day-to-day tortures of our household. This chair doesn’t have arms, and as you can see- it’s a very simple design. I was able to recover this in the 2 hours my son napped. Next up on the agenda is to make pillows for our couch with the same fabric. The jury’s still out on what to do with the original chair. Currently it’s in our family room. I am considering recovering it again… Never say never, right?


20140530-075236.jpg

20140530-075255.jpg

20140530-075307.jpg

20140530-075328.jpg

20140530-075346.jpg

20140530-075406.jpg

Guest Room Makeover, update

Tuesday night I set off to paint the room. My husband warned me it would need to be primed first. I like to take shortcuts that ultimately take me more time than had I just done things the right way first, so I didn’t listen to him. He was right, I was wrong, and Tuesday night was a disaster. 4 coats of paint and it still looked like crap.

20140522-140117.jpg
Wednesday morning I went back to Home Depot. I showed my picture to the guy at the paint counter and he confirmed what I already knew- I needed primer. I wasted so much paint the night before, I needed to buy another gallon and took a risk on a new color. I bought more paint trays,- new brush, and $60+ later was on my way home.

I primed during nap-time, and painted after Zac went to bed. Primer was definitely the right decision. This morning I put the room back together and am in love. The chair that was in this room before is now in my front sitting room and I plan to recover that next week. Wish me luck with that!

20140522-141736.jpg

20140522-141745.jpg

20140522-141757.jpg

20140522-141807.jpg

DIY fabric lampshade

I am almost embarrassed at how easy this is to do, and am questioning if this is blog worthy. But, a few years ago I didn’t realize this was possible, so maybe I can inspire someone else out there. In the summer of 2011, I was pregnant with my son. His nursery is decorated in sock monkeys. I spent that summer making his crib bedding and decorating his nursery before I returned to teaching in the fall. As I was adding the finishing touches to his room, I decided I wanted a sock monkey lamp. Now, I’m sure today that would be easy to find, but a few years ago, sock monkeys weren’t as abundant as they are today. I’d like to think I inspired their comeback, but that probably isn’t the case. Anyhow, I had leftover fabric from his quilt, and decided, “what the heck”. Searching the craft aisle at Walmart, I came across this-

IMG_6319

Messy? YES! But, it does the job, and 3 years later, his lampshade still looks as good as new.

IMG_6340

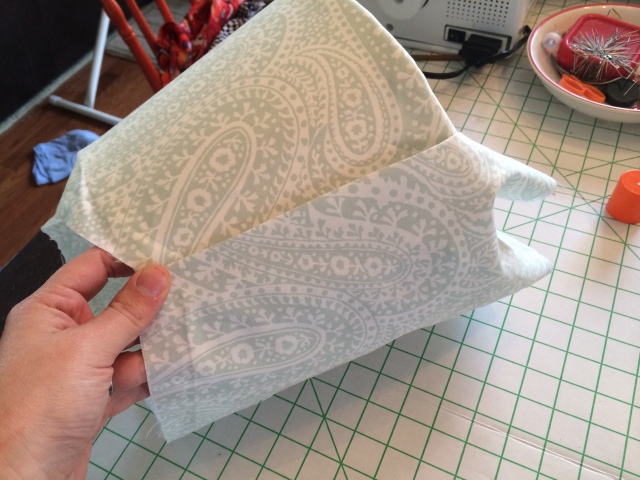
OK, back to the current project. Thanks to winning the “end of bolt JACKPOT” at fabric.com, I had extra of the aqua paisley fabric used for the throw pillows on the bed. I purchased the lamp base ($19.99) and the shade ($9.99) from Lowes.

First, I ironed the fabric to remove the wrinkles, and then I layer that flat on my work surface and put the shade in the middle. I used 2 clothes pins to make sure that the fabric would fit around the shade and all areas would be covered. Then, I sprayed a small section of the shade with the spray adhesive and used my hand to press the fabric secure. I worked my way around the shade until the ends of the fabric were almost touching.

IMG_6315 IMG_6316 IMG_6321 IMG_6322 IMG_6323 IMG_6325

Next, I cut one side even and sprayed that down flat. Then, I carried the whole thing over to my ironing board and ironed the second end to hide the raw edge. On my son’s lamp I didn’t do this, and it looks fine, but I wanted this to look a little nicer. When the edge was ironed, I sprayed that down.

IMG_6326IMG_6324

Next, I cut around the top of the lampshade leaving between .5 and 1 inch clearance. Once that was cut, I sprayed in sections and folded that edge over. I repeated the process for the bottom of the shade, again leaving between .5 and 1 inch. Not sure why, but this is where my hands got REALLY messy.

IMG_6327 IMG_6328 IMG_6330 IMG_6331

FYI- soap did nothing to get the mess off my hands. I ended up putting some rubbing alcohol on a towel and that helped get the goop off. I then washed again (and again) with warm soapy water. But, the mess was worth it. I am really happy with how this turned out. It looks great in the room. I can’t wait to get the room painted and see it 100% finished. Well, not 100%… I still plan to add the decorative nails to the headboard, and the jury is still out as to what to do for window treatments.

IMG_6336 IMG_6333