UP

As a family we started Saturday evening movie nights with Zac. For my husband and me it’s been a great chance to catch up on children’s movies we’ve missed over the past decade. A couple weeks ago, the move we watched was Up. Seriously- this movie needs to come with a warning to parents that it’s a tear jerker, and now in the typical Disney movie way. If you haven’t seen the movie, stop reading now- spoilers ahead! From watching previews I knew the old man’s wife wasn’t going to make it, but was not prepared for the topic of infertility/miscarriage. Before Zac was born, we suffered two losses so this part of the movie (while brief) hit close to home. Thankfully Zac didn’t ask questions about why the couple was decorating a nursery and then the wife was crying in the doctor’s office. My husband and I just glanced at each other and then he went and got me some tissues.

The next morning, I was going through my stash of knit fabrics, and Zac saw my Up fabric. He was pointing out the balloons and characters and he asked me to make him a shirt. How could I say no to that? Zac always gets excited when I make him outfits or pajamas out of character fabrics, but I think this is the first time he specifically asked for something. I got right to work.

I decided I wanted to make a hoodie. Previously, I have made the all ears hoodie by Max & Meena and knew I could do the hood easily (not sure why that was intimidating to me), but I wanted to add a pocket and this pattern doesn’t offer that option. I then remembered I had a hoodie pattern from Brindille & Twig (free btw) and decided to merge the two. The Up fabric is really colorful, so I wanted to use it strategically.

I decided on using grey fabric for the body of the shirt and the Up fabric for the pocket, but first I added an appliqué. IMG_3668 IMG_3676

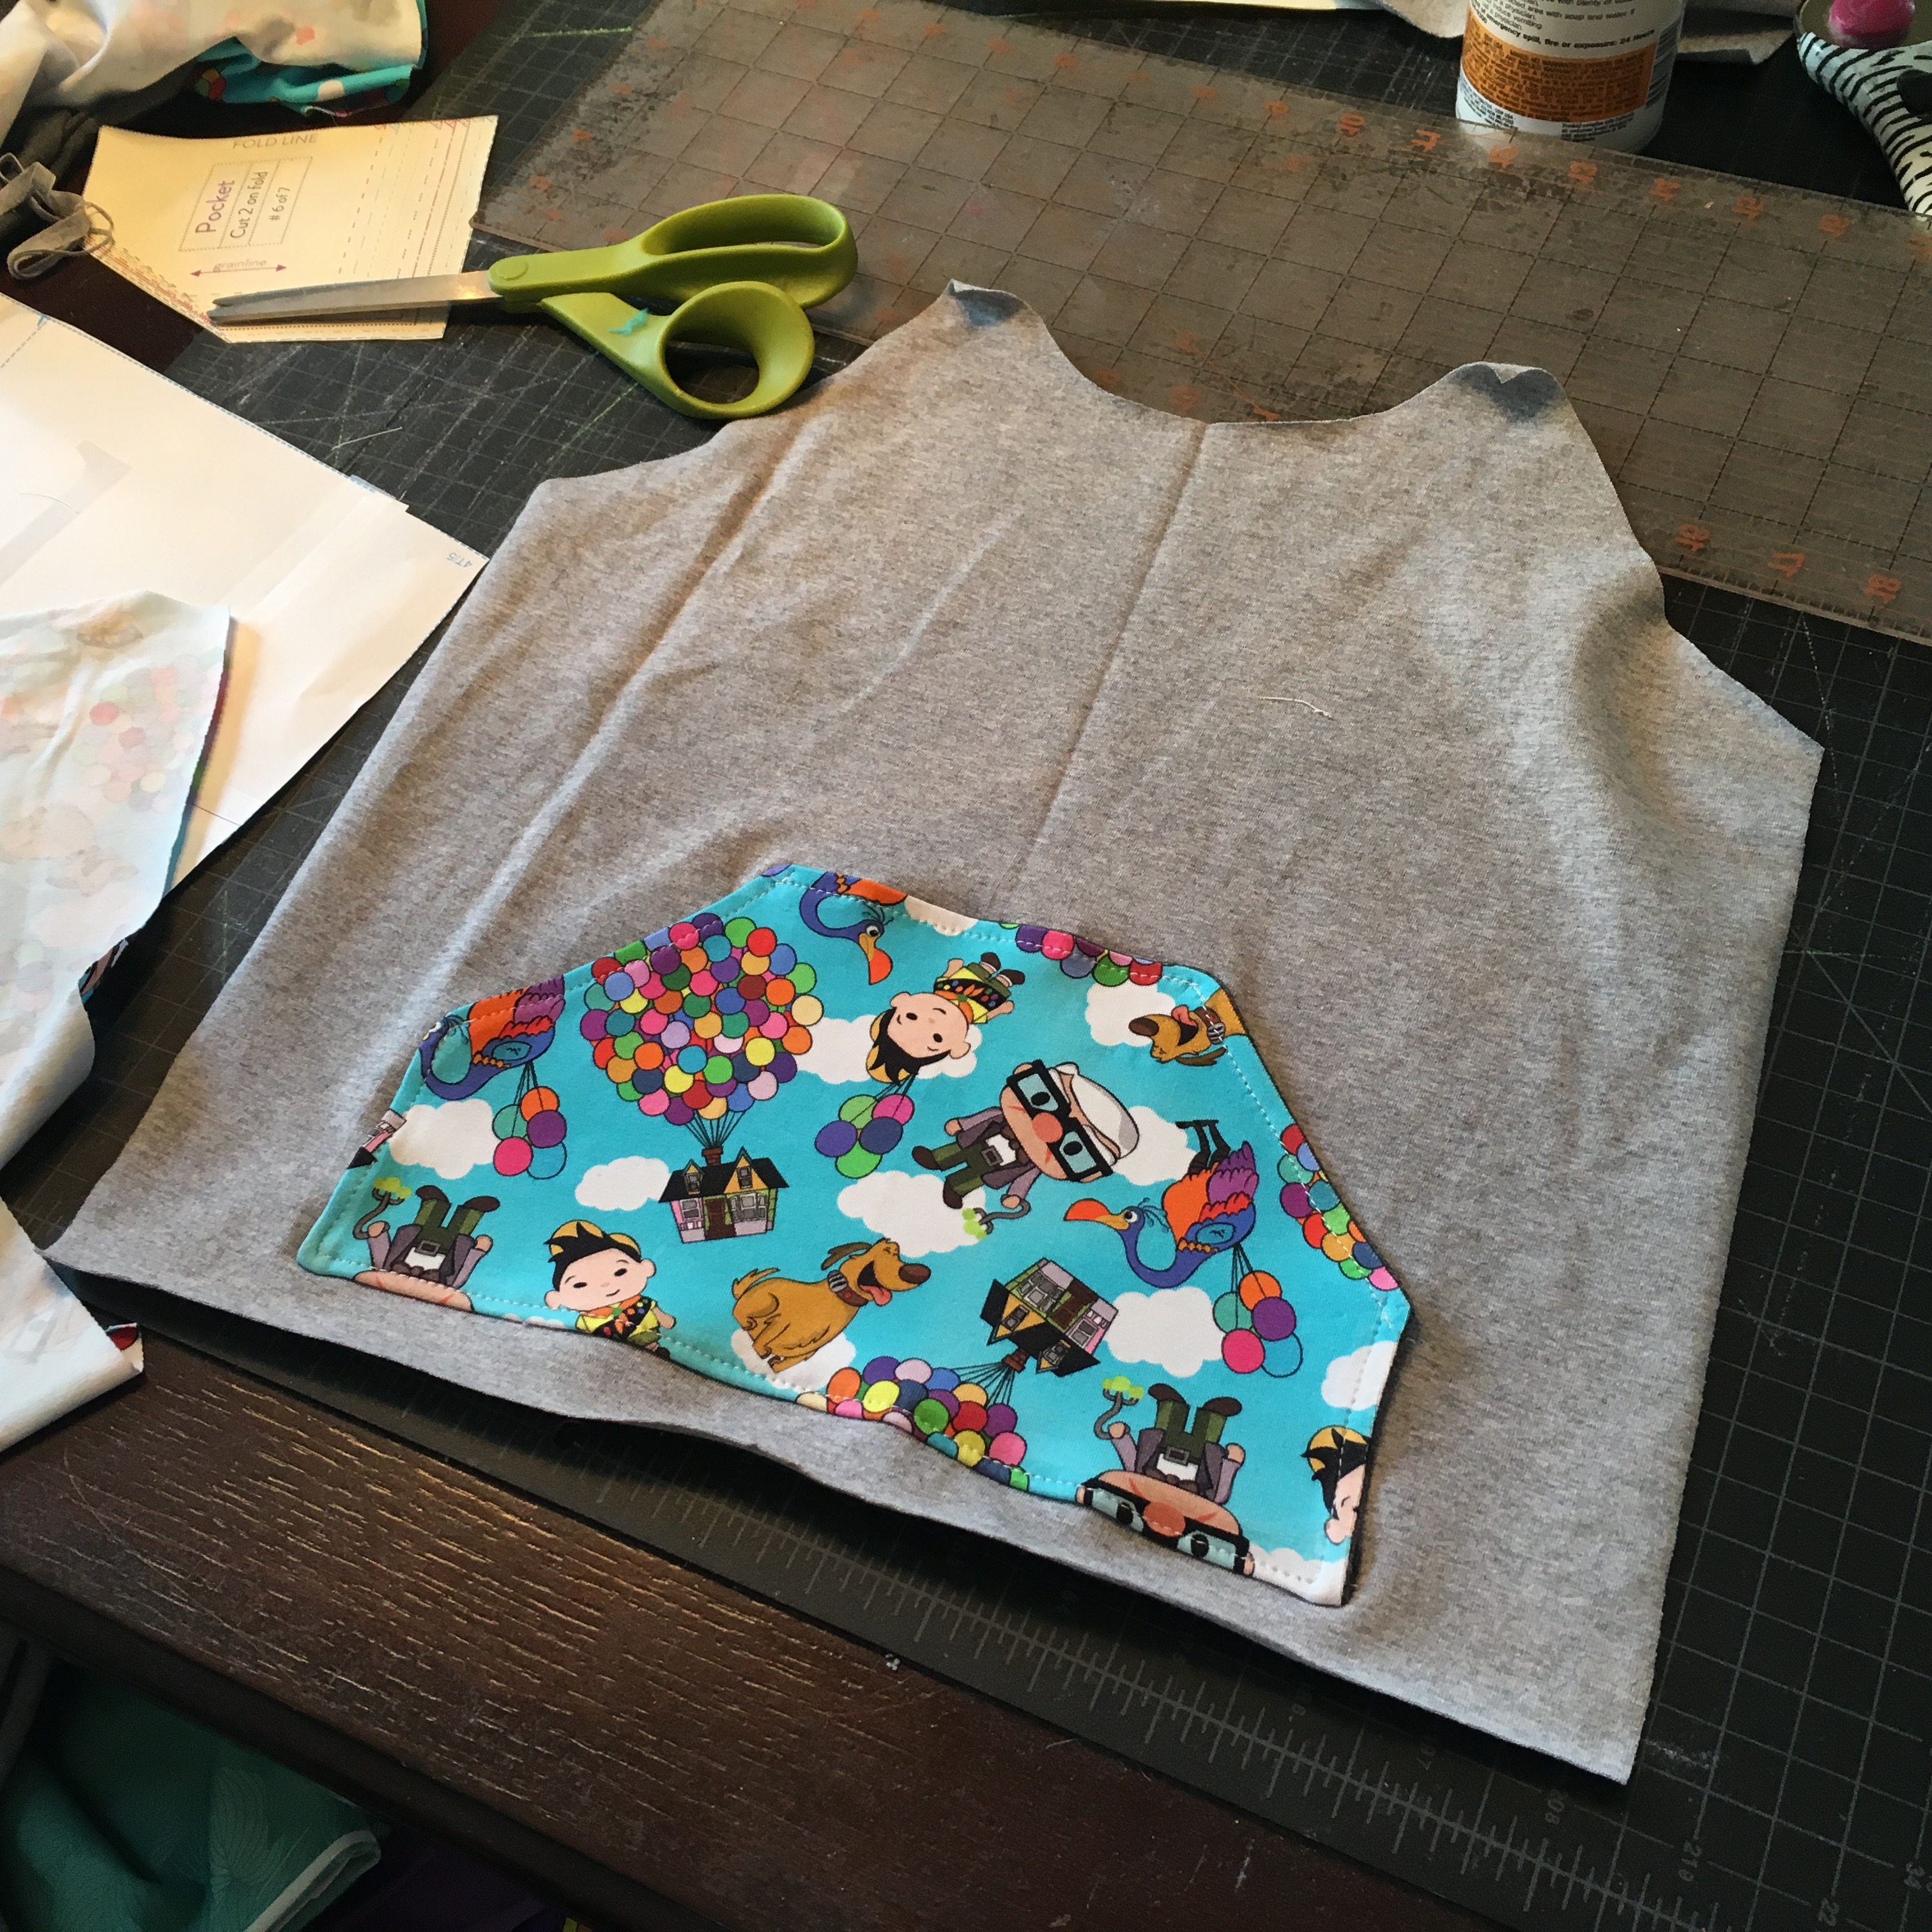
I decided to do the arms and the inside of the hood out of the Up fabric, and make the outer hood grey to match the front (and back) of the shirt. I went back and forth on what to do for the arm cuffs and the waist band, and decided on a dark grey and I’m glad I did. I absolutely love how this hoodie turned out, and Zac does too.IMG_3682 IMG_3689

The following day was Columbus Day and there was no school. My friend and I decided to take the boys to the Yellow River Game Ranch. The weather was gorgeous and it was a great opportunity to take some pictures of Zac in his new hoodie. Earlier this year my husband and I purchased a Sony a6000 camera and a 50 mm lens. It was a splurge, but I absolutely love this camera and the pictures I’m able to capture with it._DSC3092 _DSC3101 _DSC3127 _DSC3092

Tuesday Tutorial- bridesmaid dress quilt

A few years ago, I came across a pin on pinterest for a baby quilt used from a bridesmaid dress. Since then, I’ve made several of these blankets for customers and they’ve become one of my favorite projects to sew. The idea of making a quilt scares a lot of people, and I’m hoping this step by step tutorial eases your fears. If you can sew a straight line, then you can take on this project. I suggest investing in a cutting mat, a rotary cutter, straight edge, and a quilting ruler.

For the quilts I make, I usually pick out 4 fabrics that coordinate with the dress. My blankets measure anywhere from 36″ to 42″ square when completed, and if this is the size you desire, 1/4 of a yard is all you’ll need of each. IMG_8833

When you get your fabrics, iron and then cut to your desired size. For this quilt, I used a 6″ quilting ruler (which is actually 6.5″ square). To make my life easier, I cut my fabric in a 6.5″ strip, then used the quilting ruler to cut 5 equal sized squares. 
  

Repeat this with the remaining three fabrics.

When it comes to cutting the dress, don’t be afraid. Cut along the seams to give yourself large panels to work with. Do just like you did before and cut a 6.5″ strip and then use the quilting ruler to cut squares.


Once all of your squares are cut, lay them out in a design or pattern you think looks best. I always like the dress to be the middle square, and then I spread them out- always making sure each of the 5 patterns are represented in each row and column.

Now it’s time to sew! If you look behind my sewing machine in the picture, you can see how I have each of the rows laid out so they’re in order and ready.

Ta da!!! Once you have your five rows sewn together, iron the seams flat.

Now it’s time to sew your rows together to make into a blanket. I think this is the part that worries most first time quilters because with this type of blanket you want to make sure everything lines up. When I lay out two of the rows, I make sure that the seams line up exactly, then pin them in place. 
  

Once you’re pinned, it’s time to sew. Repeat this process with each remaining row. Then, just like before- iron your seams flat.
  

It’s up to you how fancy you want to get. I really like a border (or two) around the outside of my quilts. For this quilt, I used a double border and because the bridesmaid dress was long, I was able to use that too. For shorter dresses it’s not always possible to get strips of fabric long enough. For the first border on this dress, I used a grey fabric and cut it in 1.5″ strips. I sewed the strips along the sides, then across the top and bottom. Iron flat when you’re done.
  

Next up, I cut dress. I used 3″ strips for the outside.

Once your front is done, it’s time to attach the back. I used minky dot fleece for this quilt. This fabric sheds. A lot. It’s also sometimes almost slippery to work with. Use lots of pins and sew slowly. To attach the front to the back, lay your fleece down on floor, good side up.

Next, lay your quilt down so the “good” sides face one another. Cut off the salvage fleece at the top. Now, it’s time to pin. Make sure you leave yourself an opening, so that you can flip the quilt right side out.
  

When you’re done sewing, flip your quilt right side out. Iron your edge flat, and pin your hole closed. To give a finished look, I like to top stitch all the way around the quilt. Because you can see the thread, try your best to match the top thread to your top fabric, and your bobbin thread to your fleece.
  

Congratulations, you’re done!!! IMG_8938IMG_8945

I’m back

Happy Sunday friends!! It’s been awhile. I’ll do my best to post a recap this week as to what’s been going on with us. Summer with Zac home from school was busy. At 3 and a half years old, he was constantly on the go and spent the majority of our days at the swimming pool. In August he went back to school and I though life was going to get back to normal, but it didn’t. While my husband and I were out for a drive one weekend, we found a house just outside our neighborhood that was for sale. We looked it up, fell in love, made an offer and it was accepted! In two weeks’s time, we were able to get our house ready to list, and it was on the market a day before we had an offer and were then under contract!

Our dining room has acted as the headquarters of Sew Sassy Creations for the past few years, but for the purposes of selling our house it needed to be transformed back into a dining room. All of my stuff was packed and taken to storage. Now that we’re under contract, out of due diligence, and past the inspection and appraisal, I’m able to bring some stuff back (happy dance!). I’m super stoked because in the new house I’ll have my very own dedicated workspace, with a door! I’m spending my days now searching pinterest trying to decide how to set up my new space.

Attached are some pictures from the summer, Zac’s first day at school (fabric from Peekaboo fabric shop), and a picture of him sitting on the porch swing at our new house the day we went to see it for the first time. I literally carried him away kicking and screaming because he didn’t want to go back home. We took that as a good sign that he approved.

IMG_0524

IMG_2167

IMG_2189

IMG_2583