The Tale of 3 Chairs…

It all started because the chair in our front room needed help. I recovered that chair myself 7 years ago, and 2 dogs and a toddler were more than it could handle. Recovering that chair was one of the toughest sewing projects I’ve taken on, and I really had no desire to do it again, so I sent off to find myself a new (already covered) chair. I purchased the vintage rocker, but when I brought it home I didn’t like how the colors looked with the curtains. Curtains are expensive to buy, even more expensive to make yourself, and so that’s when I decided to switch up everything. The rocker went upstairs into the guest room which was getting made over anyways, and I decided to bring the chair that was upstairs down into the front living room. Those colors didn’t match either, so I faced my fears and recovered it to match.

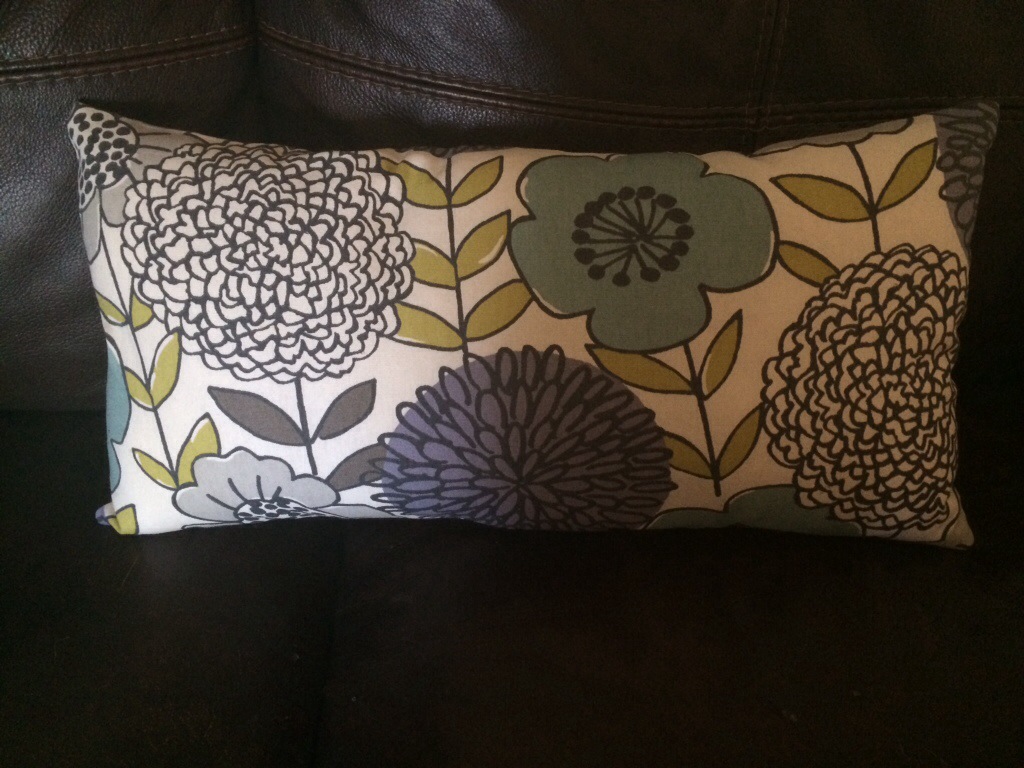
One mistake I made with the original chair was not using a sturdy enough home decor fabric. The fabric I used this time is almost canvas like, and I think it will withstand the day-to-day tortures of our household. This chair doesn’t have arms, and as you can see- it’s a very simple design. I was able to recover this in the 2 hours my son napped. Next up on the agenda is to make pillows for our couch with the same fabric. The jury’s still out on what to do with the original chair. Currently it’s in our family room. I am considering recovering it again… Never say never, right?


20140530-075236.jpg

20140530-075255.jpg

20140530-075307.jpg

20140530-075328.jpg

20140530-075346.jpg

20140530-075406.jpg

Guest Room Makeover, update

Tuesday night I set off to paint the room. My husband warned me it would need to be primed first. I like to take shortcuts that ultimately take me more time than had I just done things the right way first, so I didn’t listen to him. He was right, I was wrong, and Tuesday night was a disaster. 4 coats of paint and it still looked like crap.

20140522-140117.jpg
Wednesday morning I went back to Home Depot. I showed my picture to the guy at the paint counter and he confirmed what I already knew- I needed primer. I wasted so much paint the night before, I needed to buy another gallon and took a risk on a new color. I bought more paint trays,- new brush, and $60+ later was on my way home.

I primed during nap-time, and painted after Zac went to bed. Primer was definitely the right decision. This morning I put the room back together and am in love. The chair that was in this room before is now in my front sitting room and I plan to recover that next week. Wish me luck with that!

20140522-141736.jpg

20140522-141745.jpg

20140522-141757.jpg

20140522-141807.jpg

DIY fabric lampshade

I am almost embarrassed at how easy this is to do, and am questioning if this is blog worthy. But, a few years ago I didn’t realize this was possible, so maybe I can inspire someone else out there. In the summer of 2011, I was pregnant with my son. His nursery is decorated in sock monkeys. I spent that summer making his crib bedding and decorating his nursery before I returned to teaching in the fall. As I was adding the finishing touches to his room, I decided I wanted a sock monkey lamp. Now, I’m sure today that would be easy to find, but a few years ago, sock monkeys weren’t as abundant as they are today. I’d like to think I inspired their comeback, but that probably isn’t the case. Anyhow, I had leftover fabric from his quilt, and decided, “what the heck”. Searching the craft aisle at Walmart, I came across this-

IMG_6319

Messy? YES! But, it does the job, and 3 years later, his lampshade still looks as good as new.

IMG_6340

OK, back to the current project. Thanks to winning the “end of bolt JACKPOT” at fabric.com, I had extra of the aqua paisley fabric used for the throw pillows on the bed. I purchased the lamp base ($19.99) and the shade ($9.99) from Lowes.

First, I ironed the fabric to remove the wrinkles, and then I layer that flat on my work surface and put the shade in the middle. I used 2 clothes pins to make sure that the fabric would fit around the shade and all areas would be covered. Then, I sprayed a small section of the shade with the spray adhesive and used my hand to press the fabric secure. I worked my way around the shade until the ends of the fabric were almost touching.

IMG_6315 IMG_6316 IMG_6321 IMG_6322 IMG_6323 IMG_6325

Next, I cut one side even and sprayed that down flat. Then, I carried the whole thing over to my ironing board and ironed the second end to hide the raw edge. On my son’s lamp I didn’t do this, and it looks fine, but I wanted this to look a little nicer. When the edge was ironed, I sprayed that down.

IMG_6326IMG_6324

Next, I cut around the top of the lampshade leaving between .5 and 1 inch clearance. Once that was cut, I sprayed in sections and folded that edge over. I repeated the process for the bottom of the shade, again leaving between .5 and 1 inch. Not sure why, but this is where my hands got REALLY messy.

IMG_6327 IMG_6328 IMG_6330 IMG_6331

FYI- soap did nothing to get the mess off my hands. I ended up putting some rubbing alcohol on a towel and that helped get the goop off. I then washed again (and again) with warm soapy water. But, the mess was worth it. I am really happy with how this turned out. It looks great in the room. I can’t wait to get the room painted and see it 100% finished. Well, not 100%… I still plan to add the decorative nails to the headboard, and the jury is still out as to what to do for window treatments.

IMG_6336 IMG_6333


Pillows, Pillows, Pillows

Making pillows isn’t anything glamorous. They were one of the first things I learned to sew. While pillows are fairly simple, there is always room to mess up. I’m not afraid to admit when I make a mistake, and I majorly goofed on these. I’m not sure if it was not ordering enough fabric, or not measuring carefully before I cut the fabric, but somewhere along the way, I didn’t have enough fabric to make the shams I wanted. No huge deal, I had enough to cover the pillows and that’s really all that matters. I did a simple envelope back and slid in the pillows.

For the throw pillows, I also goofed (I thought the pillows I had were 18″, but they are actually 20″), but thankfully I got the end of the bolt and extra fabric for free! Again, I did an envelope back and slid in the old navy blue throw pillows. Along with the floral rectangle pillow I made last week, I love the look!

Today I went to Lowes and bought furniture nails to go around the headboard, the painting supplies that I forgot last week, and a lamp. I couldn’t find a lampshade that I loved, so I bought one with a shape I loved and I plan to cover the lampshade with leftover fabric from the throw pillows. I promise to take great pictures throughout this project. Covering lampshades is cheap, easy, and a great way to customize them match your rooms.

20140520-124812.jpg

20140520-124819.jpg

20140520-124825.jpg

20140520-124834.jpg

20140520-124846.jpg

20140520-124852.jpg

Upholstered Headboard

Like so many others, our guest bed was just a mattress and box spring. It served it’s purpose, but wasn’t anything fancy. I’ve mentioned before, I’m a huge fan of HGTV. I love design shows, especially those that show you how to complete projects yourself. That paired with pinterest is a dangerous combination. Thankfully this project was simple and cheap to complete. First, I positioned the pillows on the bead and measured how far I wanted the headboard visible. Looking at other headboards, I measured up from the top of the box spring/bottom of the mattress, and decided on 32″ high. I then measured the width of the box spring and added 2 inches (one for each side), and decided on 54″ wide. I gave these numbers to my super handy husband, who had picked up a piece of 1/2″ plywood earlier in the week. He quickly cut the rectangle, and then using a handy-dandy triangle thingie, we angled the corners at 6″. IMG_6179

Once the wood was cut to size, we brought it inside. I laid my batting on the floor and smoothed out all wrinkles, put the headboard on top, and used a staple gun to secure it to the back. I purchased a polyester batting with extra loft that was crib size, and it worked perfect for the full size headboard. On all of my quilts, I use 100% cotton batting, but that is more expensive, and I figured for this project, the polyester was fine. That was $9.99 from Hobby Lobby, but 30% off, so I got it for $7. IMG_6185 IMG_6188 IMG_6189

I went back and forth on what fabric to use on the headboard. I thought about a printed home decor fabric, but that kinda limited me on my bedding. I thought about something solid, but couldn’t decide on a color, and I wanted something with dimension. I then decided on burlap. I wasn’t sure how it would do since it’s textured and you can see through it, but I had some from other projects, and pairing it with the batting looked great. Plus, burlap is super cheap. I purchased 2 yards from Hobby Lobby and used a 40% off coupon, bringing my fabric total to $6. Whoot whoot!! The burlap had some noticeable wrinkles, so I ironed it the best I could, spread it flat on the floor, put the headboard on top of it, and stapled the burlap to the back just like I did with the batting. IMG_6196 IMG_6197

Ta-da! Here it is, front and back. I maaaaay have gone a little overboard with the staples… IMG_6206IMG_6200

We attached legs to lift the headboard up behind the box spring. The headboard now rests against the wall, but is supported by the box spring and mattress. I’m thinking about adding decorative copper finishing nails around the border of the headboard, but that won’t come till later. Pillows were my project for today, so I’ll post an updated picture of the bed soon. I hope I inspired someone else to take on this project. I am grateful to my husband for his help!!!

IMG_6213 IMG_6214

Back and better than ever!

My sister is here visiting this week, so Thursday Zac and I went down to my parents’ house to spend the day with her. Conveniently on the way was the Atlanta Sewing Machine Co. (a Singer verified warranty center).

IMG_6130

It seriously broke my heart to leave my machine. I feel like she is a member of the family. The people there were awesome. Someone immediately glanced at my machine, and my scrap piece of fabric showing the bobbin hiccups, and how they improved with increased tension.

IMG_6106

IMG_6107

Just from glancing at my machine, she could see that the needle plate needed buffed. She offered to have their tech look at it immediately if I had 30 minutes to wait. No amount of yogurt covered raisins could keep my child contained in a sewing machine repair shop for 30 minutes, so I told her thanks, but we didn’t need to wait- we were on our way to see Aunt Abbey, Nana, and Ugh (Zac speak for Grandpa). She said that they would call me in a bit and give me the diagnosis. I left the shop at 11:15, and at 1:30 they called to tell me it was ready to be picked up. I really thought that I’d be without my machine for at least a week. The repair shop was just 30 minutes away from my parents’ house, so I was able to go and get it then. I was stoked! They gave me a test piece of fabric showing all the stitches, and it was perfection. When I got home, I plugged it in, and tried it out for myself. I swear, it sews better than the day I bought it. Because my machine is less than a year old, and because I went to a warranty center, I didn’t have to pay a dime. They cleaned, oiled, and toned-up the machine. They buffed the needle pole, reset the hook for the automatic needle threader, and adjusted the tension (the cause of my issues). They also replaced the place where the electrical cord plugs in, because as often as Zac has yanked on it, the cord didn’t fit tight.

This weekend I am finishing up a t-shirt quilt for a graduating high school senior, and then it’s to work on Project Guest Room. My husband is cutting the plywood for the headboard tomorrow, then I hope to paint the room Sunday, and after that, it’s pillows. Ahhh, can’t wait, so stay tuned friends!

Not my day

It seems that this always happens to me- a 5 minute project ends up consuming your entire day. This morning I ran to Hobby Lobby for fabric for the upholstered headboard. While I was there I found a funky floral fabric that I thought would make a fun accent pillow for the bed. During nap time, I decided to stitch it up quick to see how it looked. “Quick” it was not.

When I looked at the back side of the fabric, I could see that the bobbin thread was bunching. I did what anybody with a sewing machine would do, retreaded the top and bobbin thread and tried again. Bunching was still there. I trouble shouted some more and took out the whole bobbin case, blew out the dust. That wasn’t it either. I changed the needle, tried different thread, tried different fabric, consulted Dr. Google, messed with the tension- which helped somewhat, but not enough. I eventually ended up on hold with Singer for over an hour before speaking with a human.

I understand that the average person probably is clueless. She walked me through threading my machine, asked me if I was using Singer needles and bobbins, and troubleshooted changing tension settings before telling me that I needed to take my machine in for servicing. Not what I wanted to hear. My machine is only 9 months old, so thankfully everything is under warranty, but the closest warranty center is almost an hour away. I already planned to visit my family on Thursday, so I’ll drop it off then, and pray it’s a quick & easy fix. It makes me physically ill to think about being without my machine, but it needs to be fixed.

I write this post so that hopefully someone else who’s having this annoying issue can look here and see they’re not crazy. I’ll update with my diagnosis too. Here you can see the top of the fabric vs the back. The zigzag stitch is the worst. The different lines are different tensions. The higher the tension, the better the bobbin thread is.

20140513-202129.jpg

Here is a close up of the back of a straight stitch. The thread kinda loops.

20140513-202223.jpg

And here’s my pillow. I’m in love!

20140513-202258.jpg

20140513-202310.jpg

Fabric!!!!!!

Fabric arrived today for my pillow shams and the throw pillows for the bed. I am so excited and it’s just as beautiful as it looked online. Fabric.com is my favorite place to order fabric. It’s easy to navigate their site, they have a huge selection, and they’re based out of Atlanta, so I get my fabric in just a few days. In case you didn’t know, I am kinda impulsive and I hate waiting for stuff. Last night I put the new duvet cover on the bed. As expected, if fits great. Ikea sizes are slightly different. They offer twin, full/queen, and king. The current comforter is a full/queen (also purchased from Ikea), as is the new duvet. Sometimes full size comforters seem too small on full size beds, queens can be too long, but the full/queen is perfect.

Yesterday I mentioned the vintage rocker, but didn’t post a picture. I found this at a local consignment shop. My grandmother has a rocking chair that is similar, although her’s isn’t upholstered. I used that chair to rock Zac to sleep when we visited (back when he let me rock him to sleep). When I saw this chair, I had to have it. I bought it with the intention of putting it in our front room, but when I got it home realized it clashed horribly with the curtains. I already knew I wanted to give the guest room a makeover, and decided that this chair would be the inspiration. I found the aqua paisley fabric first, and went from there. I decided on the white duvet cover because it’s classic and will match anything.

While I am super excited to start this project, I have actual work that needs done before I can start on this. I am currently working on a t-shirt quilt for a customer, and I have orders for scarves, bibs, and one of the Wild Things pillows that need to be completed first. Don’t worry though- nothing will happen in this room without me sharing it on the blog. Hoping to buy paint and the wood for the headboard this weekend, and get started next week. Until then, here are some pictures for today.

20140507-133006.jpg

20140507-133014.jpg

20140507-133136.jpg

20140507-133158.jpg

Guest Room Makeover

We’ve been in our house just over 8 years. Crazy to think we’ve been here that long. In that time our guest room has gone through several changes. It was first a guest room, then man-cave/office, then a guest room/office, and now it’s back to a dedicated guest room.

I love watching DIY shows and HGTV. I love decorating, especially when it involves me sewing something. A few weeks ago, I got the idea that I wanted to make an upholstered headboard for the guest room. My husband OKed this project. I then decided I needed to paint the room. He OKed that project too. Somewhere along the way the project went from paint and a headboard to those, plus new bedding and pillows, window treatments, and a new chair. (Adding the new chair involves moving the existing chair downstairs and reupholstering it… Another post for another day).

If you’re still reading, hats off to you! Today, I made the trip to Ikea for the new duvet cover. If you aren’t fortunate enough to live close to an Ikea, I’m sorry. It is seriously one of my favorite places. I was able to bribe my mom to meet me and Zac there today to help. Ikea with a 2-year-old is not something I ever want to do alone.

I plan on blogging along with each step of this project, so stay tuned for updates! I got an email today that the fabric for my pillows shipped. I feel like a kid on Christmas!

No blog post is complete without pictures. First is my “before”. You can see the peg board on the wall from when it was my husband’s man-cave/office. The chair that is there is moving downstairs and I have a super awesome vintage rocking chair that is taking it’s place. I’ve also included a selfie of us from Ikea today. I am typing this out as I sit in the backyard, so I’ve included a picture of that too.

20140506-163951.jpg

20140506-164056.jpg

20140506-164154.jpg